Reverse Engineering Binaries With AI

In this post, we’re going to configure an environment that will support a locally-hosted LLM to aid in reverse engineering and binaries. For this, we’ll be using:
- Virtualbox
- Ollama with a correspondingly appropriate GPU (in my case an NVIDIA GTX 3090)
- A Kali Linux Virtual Machine
- Ghidra
- GhidrAssist
- GhidraMCP
System Architecture
At a high-level, this is the architecture we’re looking to build:
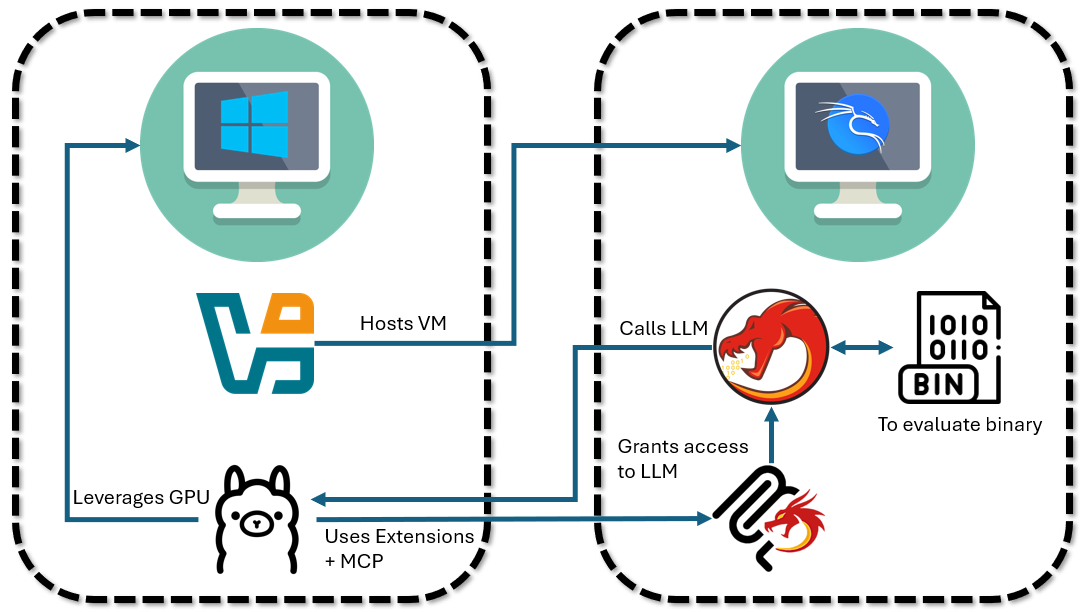
I’m using a Windows desktop machine with an NVIDIA GTX 3090 GPU. On this machine, I’ll host a guest Kali Linux VM where all of the binary analysis will take place. To support this virtualized environment, we’ll make use of the Virtualbox hypervisor. However, because Virtualbox doesn’t support GPU passthrough (see my related post on the topic in building a game anti-cheat test environment earlier in the year), we’ll likewise need to host the local LLM directly on the host machine (vs. within Kali Linux). Within the Kali Linux VM, we’ll run Ghidra to decompile our binary. Ghidra’s functionality will be extended with GhidrAssist, which will let us query details about the binary against our LLM. The LLM - in turn - can make use of GhidraMCP and the MCP protocol to directly take investigative actions on the binary on our behalf.
Host Machine Setup
First, we’ll need to install Ollama. Ollama is an open-source tool that allows users to run LLMs on their own local machine vs. querying closed source models like OpenAI’s chatGPT models.
NOTE: while our setup in this blog focuses more narrowly on using a locally-hosted LLM, the setup that follows can be trivially adjusted to use OpenAI or Anthropic models.
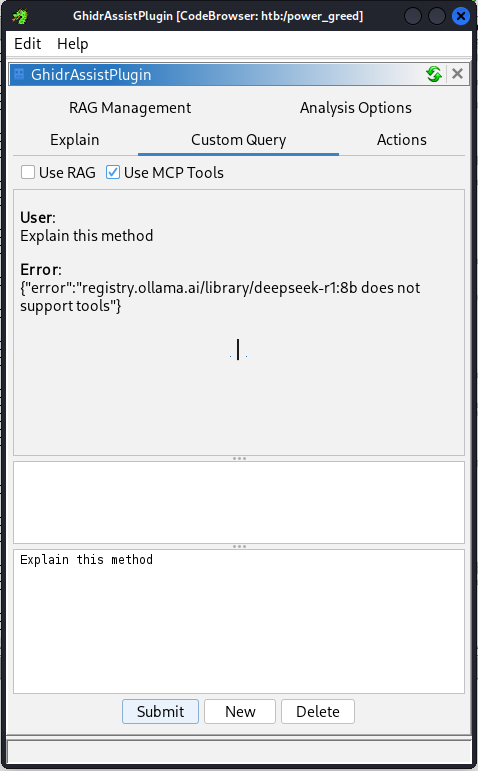
To do this, we simply need to download Ollama and then install it. After installation, we’ll need to pick an appropriate model to install. GhidrAssist’s maintainer asserts the DeepSeek-r1 models (and DeepSeek-r1:32b specifically) work well for them. However, in my own testing I found that none of the DeepSeek-r1 models would support the MCP protocol.
In fact, DeepSeek-r1’s lack of tool support is a known point of friction for a lot of people; some get it to work, but it’s stability as of writing this post is questionable. Instead, I found the qwen3:32b model to work better. To fetch this model, open a terminal and download it using the following command:
1
ollama pull qwen3:32b
Guest Machine Setup
Pulling the ollama model will take some time, so while that’s happening, let’s get the Kali Linux VM setup. To start with, you’ll need to download and install VirtualBox. You’ll also need to pull a copy of Kali Linux to get hosted by the hypervisor. Once both of these are pulled down and VirtualBox is installed, follow these steps to get the VM up-and-running.
Inside of the Kali Linux VM, we’ll now need to install Ghidra, GhidraMCP, and GhidrAssist. First, we’ll make sure our list of available packages is up-to-date:
1
sudo apt update
And then we’ll install Ghidra:
1
sudo apt install ghidra
Following that, we’ll pull the latest release from GhidraMCP (at the time of writing this, that’d be release 1.4):
1
2
3
cd ~
wget https://github.com/LaurieWired/GhidraMCP/releases/download/1.4/GhidraMCP-release-1-4.zip
unzip GhidraMCP-release-1-4.zip
As well as GhidrAssist (at the time of writing, release ghidra_11.4.2_PUBLIC_20250928):
1
2
3
cd ~
wget https://github.com/jtang613/GhidrAssist/releases/download/0.32.0/ghidra_11.4.2_PUBLIC_20250928_GhidrAssist.zip
unzip ghidra_11.4.2_PUBLIC_20250928_GhidrAssist.zip
Finally, we’ll create a virtual environment with Python and download the requisite Model Context Protocol libraries:
1
2
3
4
python3 -m venv .venv
source .venv/bin/activate
pip install "mcp[cli]"
pip install requests
First Contact
Now that we’ve got the big pieces together, let’s get the LLM up and running.
On the Windows host machine, run ipconfig and note your IPv4 address (this will likely resemble something like 192.168.1.11, though perhaps with a different last set of digits). You’re going to need this later when setting up the MCP server on the Kali Linux machine.
Now run the following commands in a terminal like powershell:
1
2
3
export OLLAMA_HOST=0.0.0.0
export OLLAMA_PORT=11434
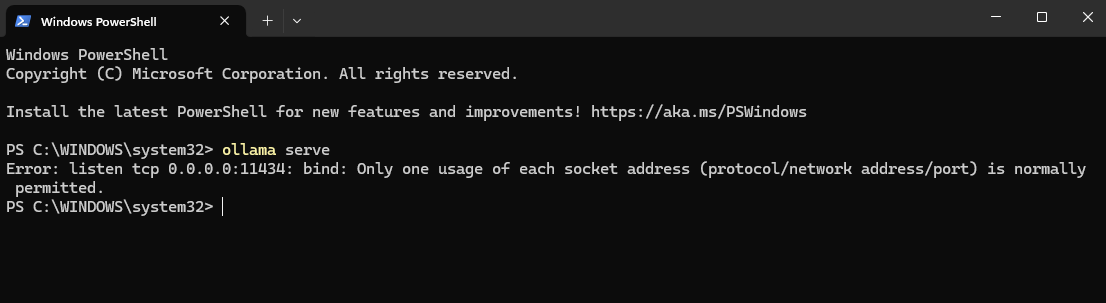
ollama serve
Note: if you see an error like the one below, just use Task Manager to kill Ollama and then re-run the
ollama servecommand.
Back in the Kali Linux VM, we’ll want to set one of the VM’s network adapters to “Bridged”. If powered down, we can do this through Settings -> Network. Otherwise if the VM is still powered on from earlier, then you can click on the Devices dropdown in the VM’s top-left window, then Network, and then Network Settings. Either way you go about it, setting the network adapted to “Bridged” will assign your guest VM an IPv4 address in the same subnet as the host.
Next, we’ll confirm that the VM is able to reach and communicate with the LLM. Let’s issue the following command from a terminal within Kali Linux:
1
curl http://<WINDOWS IPv4>:11434/api/tags
Referencing our earlier example, we would expect a successful call to look like:
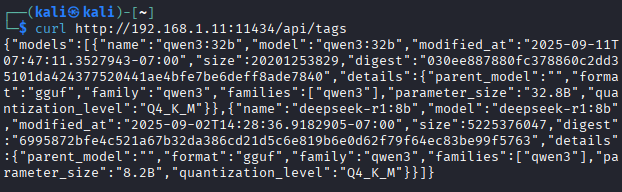
For ollama, the /api/tags endpoint lists (among other things) the available models locally loaded. If we get a response like the one above back, then we know that the VMs are networked together appropriately.
Setting up MCP
Within the Kali Linux VM, navigate into the GhidraMCP directory you unzipped and run the bridge_mcp_ghidra.py file such that it points back at the Kali Linux guest VM:
1
python bridge_mcp_ghidra.py --transport sse --mcp-host KALI_LINUX_IPv4 --mcp-port 8081 --ghidra-server http://KALI_LINUX_IPv4:8080/
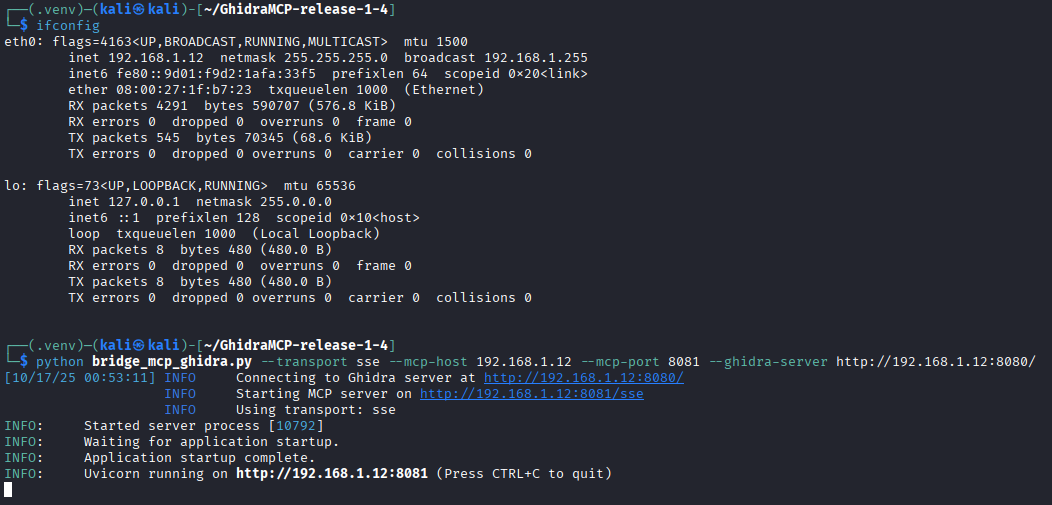
Note: we need to explicitly specify the Kali Linux VM IPv4 because the MCP server isn’t being hosted on the same machine that’s running the LLM. If we didn’t (or used a more generalized 0.0.0.0 address), then the LLM wouldn’t be able to directly interact with Ghidra.
Setting up GhidrAssist
Our last step in this is getting the GhidrAssist plugin up-and-running. We’ll start by booting-up Ghidra by running the following command in Kali Linux:
1
ghidra
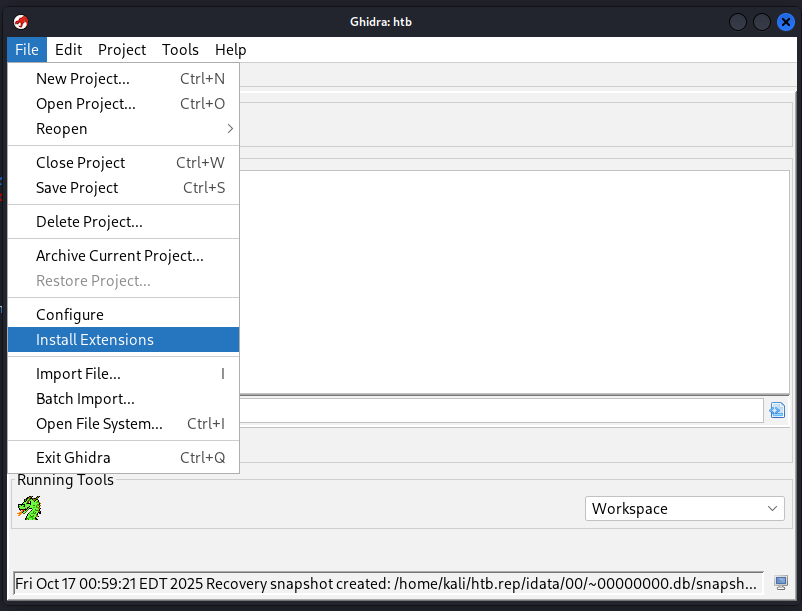
Then we’ll click on File and Install Extensions:
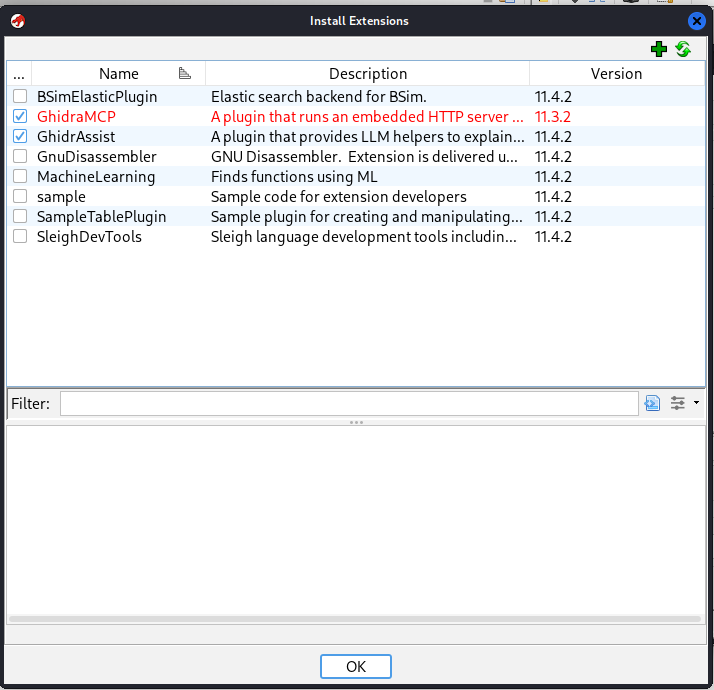
And after, enable GhidraMCP and GhidrAssist:
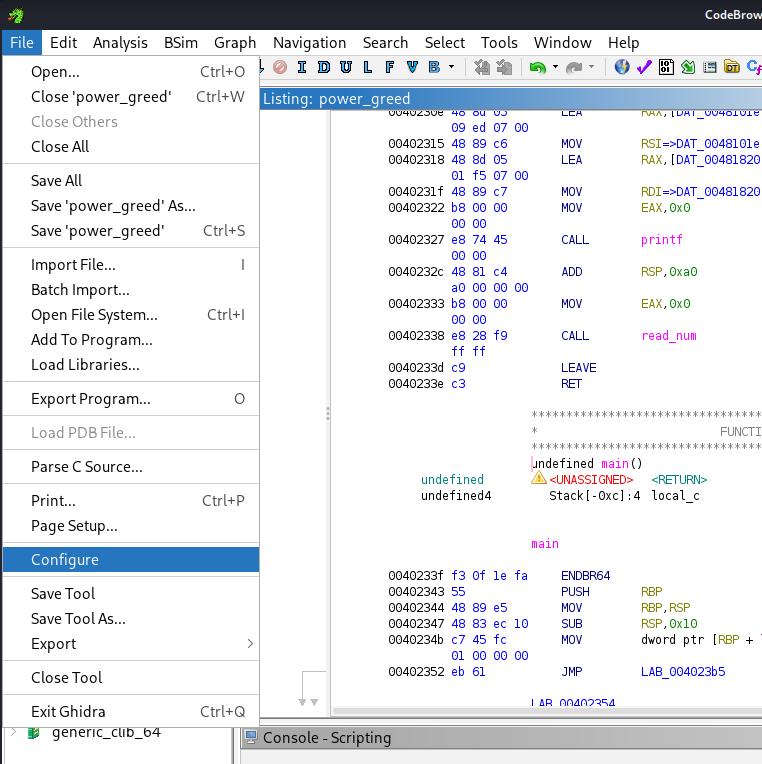
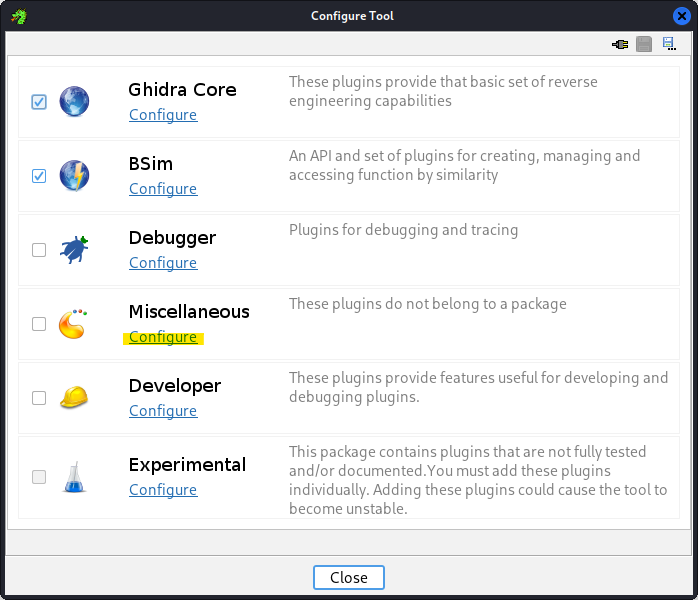
After importing a given binary into a CodeBrowser window, we’ll need to enable it for analyzing that binary. We’ll click on File and then Configure:
Then in the Configure Tool panel that pops up we’ll select Configure within Miscellaneous:
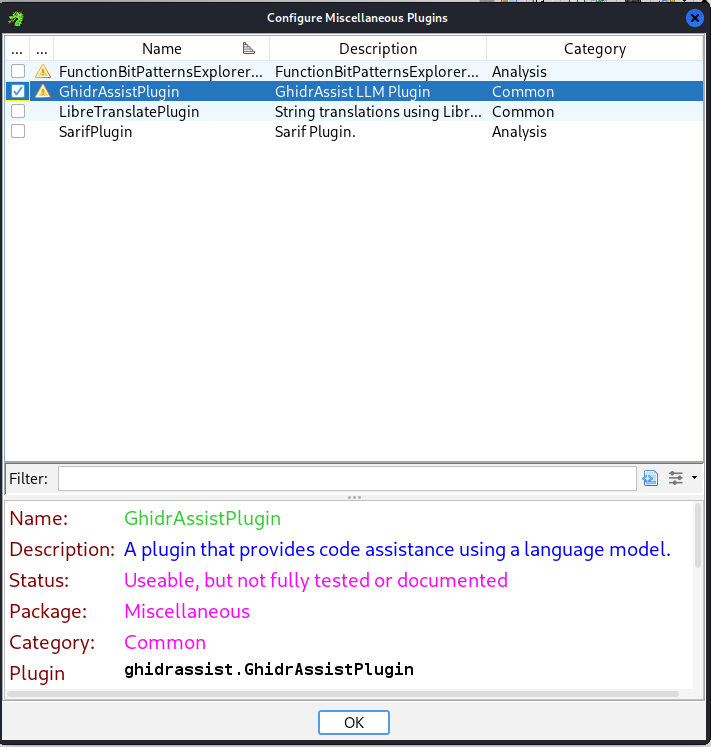
We’ll then click on the toggle box to enable GhidrAssistPlugin, and then OK:
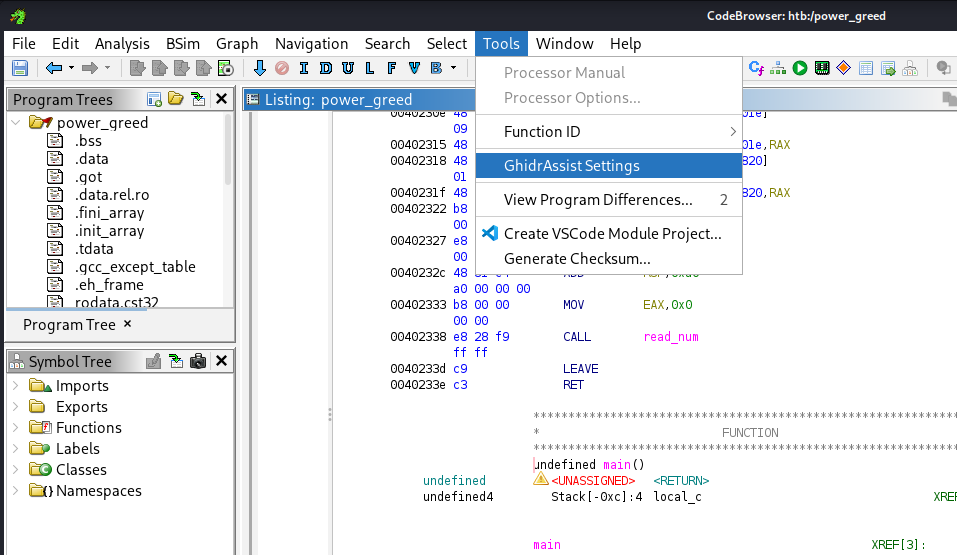
Nearly there! Our last step is to configure the GhidrAssist plugin so it knows what LLM to call and where to direct the LLM when it needs to use tools to interact with Ghidra directly. We’ll start by clicking on the Tools dropdown menu within CodeBrowser, and then GhidrAssist Settings:
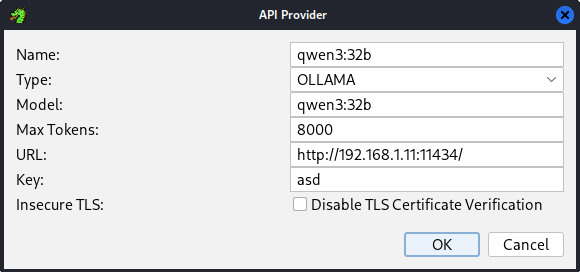
After that, Add a new API and configure it to point to the Ollama LLM. The important settings are Type (OLLAMA), Model (matching whatever you loaded into ollama at the start, like qwen3:32b), Max Tokens (variable, depending on your GPU. I set it to 8000), and URL (the Windows Host IPv4 and ollama port). The Name and Key are arbitrary.
Note: the
Keywould matter if we were using a closed-source model, like fromOpenAIorAnthropic. In those instances, we’d use the API key.
Below is an example of what this might look like:
After that, you can click on Test against the model to verify connectivity.
Finally, we’ll click on the MCP Servers tab in the GhidrAssist Settings menu and then Add Server to setup the server to match what we had set in our bridge_mcp_ghidra.py script:
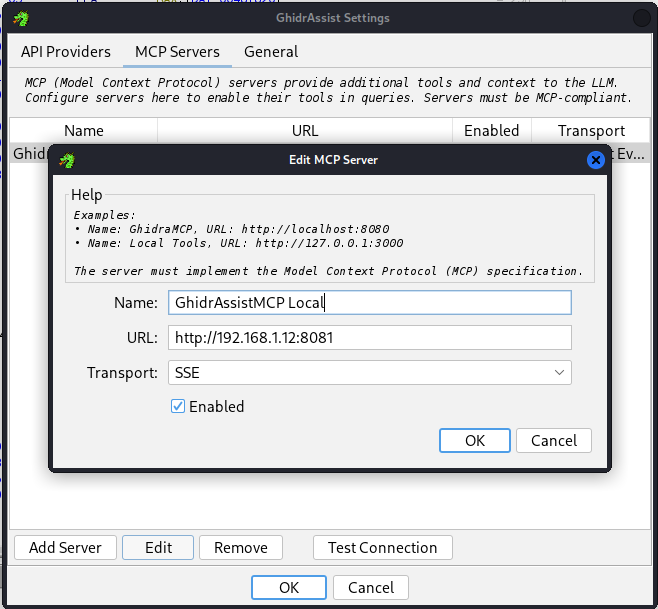
And we can likewise Test Connection to ensure it’s working.
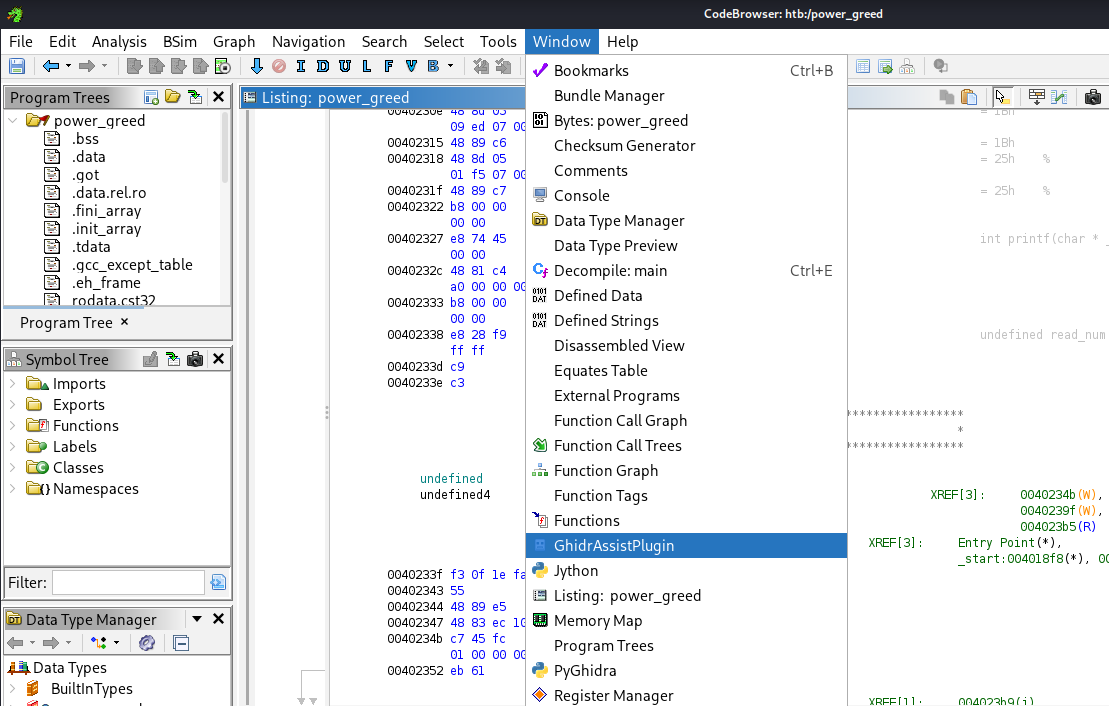
We can now open the GhidrAssist within CodeBrowser by clicking on the Window dropdown and selecting GhidrAssistPlugin:
Using GhidrAssistPlugin
One of the first things you’ll want to do is review the Analysis Options system context. This is a kind of system prompt which prefixes calls to the LLM. By default, it’s pretty good. However, if you plan on using this for reviewing CTF (pwn) binaries, it may help to adjust it slightly to provide it that added context.
Beyond that, there’s several other menu tabs you might consider:
RAG Management- In case you want to enhance the context of your analysis with other documents, you can do that here! This lets you add arbitrary documents for the LLM to reference.
Custom Query- You can consider this as being akin to a chat window directly with the LLM. It has 2 toggle options in case you want the chat to use either RAG, MCP, or both. In practice, I’ve found this to be a little unwieldy with locally-hosted models.
Actions- I haven’t really been able to consistently apply this. I think this is meant to connect with
GhidraMCPin order to perform some typical reverse engineering initial actions (like renaming unknown functions or variables within Ghidra). In practice however, I haven’t observed it do much.
- I haven’t really been able to consistently apply this. I think this is meant to connect with
Explain- Of all the menu tabs, this one was the most useful. As you click about assembly instructions/functions in Ghidra, the current address offset updates in this panel. At any point you can take a minute to click on either
Explain Lineif you don’t understand what the particular Assembly operation is doing orExplain Functionif you want the model to tackle the bigger context.
- Of all the menu tabs, this one was the most useful. As you click about assembly instructions/functions in Ghidra, the current address offset updates in this panel. At any point you can take a minute to click on either
And that’s it!
This has been pretty neat to play with. Enjoy!